

Hey there! As a supplier of OPS Windows 10 products, I'm super excited to share with you how to use the on-screen keyboard in OPS Windows 10. It's a handy feature that can come in really useful, especially in situations where a physical keyboard isn't available or convenient.
First off, let's talk about what an on-screen keyboard is. It's basically a virtual keyboard that you can use to type on your screen. In OPS Windows 10, it's a great alternative when you don't have a regular keyboard nearby. Maybe you're using a touchscreen device, or your keyboard is acting up. Whatever the reason, the on-screen keyboard has got you covered.
Accessing the On-Screen Keyboard
To start using the on-screen keyboard in OPS Windows 10, there are a couple of easy ways to access it. The first method is through the Start menu. Just click on the Start button, which looks like the Windows logo at the bottom-left corner of your screen. Then, type "On-Screen Keyboard" in the search bar. As you start typing, the On-Screen Keyboard app should pop up in the search results. Click on it, and the on-screen keyboard will appear on your screen.
Another quick way is to use the keyboard shortcut. Press the Windows key + Ctrl + O on your physical keyboard (if you have one). This will instantly bring up the on-screen keyboard. It's a real time-saver, especially if you need to use it frequently.
Using the On-Screen Keyboard
Once the on-screen keyboard is up, using it is pretty straightforward. It looks a lot like a regular keyboard, with all the letters, numbers, and symbols you'd expect. You can click on the keys with your mouse or use your finger if you're on a touchscreen device.
The on-screen keyboard also has some useful features. For example, there's a "Shift" key, just like on a regular keyboard. If you want to type a capital letter or use a symbol that's on the upper part of a key, click the "Shift" key first. You can also hold it down for multiple capital letters or symbols.
There's also a "Num Lock" key. If you need to use the number pad on the right side of the keyboard, click the "Num Lock" key to activate it. The number pad keys will then function as numbers instead of their secondary functions, like arrow keys or page up/down.
Customizing the On-Screen Keyboard
One of the great things about the on-screen keyboard in OPS Windows 10 is that you can customize it to suit your needs. You can change its size, color, and even the layout. To do this, click on the "Options" button on the on-screen keyboard itself. This will open a window with various customization options.
You can adjust the size of the keyboard by using the slider in the "Size" section. If you have a large screen and want a bigger keyboard for easier clicking, just slide the bar to the right. Conversely, if you want to save some screen space, slide it to the left.
In the "Color" section, you can choose a different color scheme for the keyboard. This can be useful if you want to make the keys stand out more or if you prefer a certain color. There are several pre-set color options to choose from, so you're sure to find one that you like.
As for the layout, you can switch between different keyboard layouts. For example, if you need to type in a different language, you can select the appropriate language layout. This is really handy for multilingual users.

Compatibility with OPS Devices
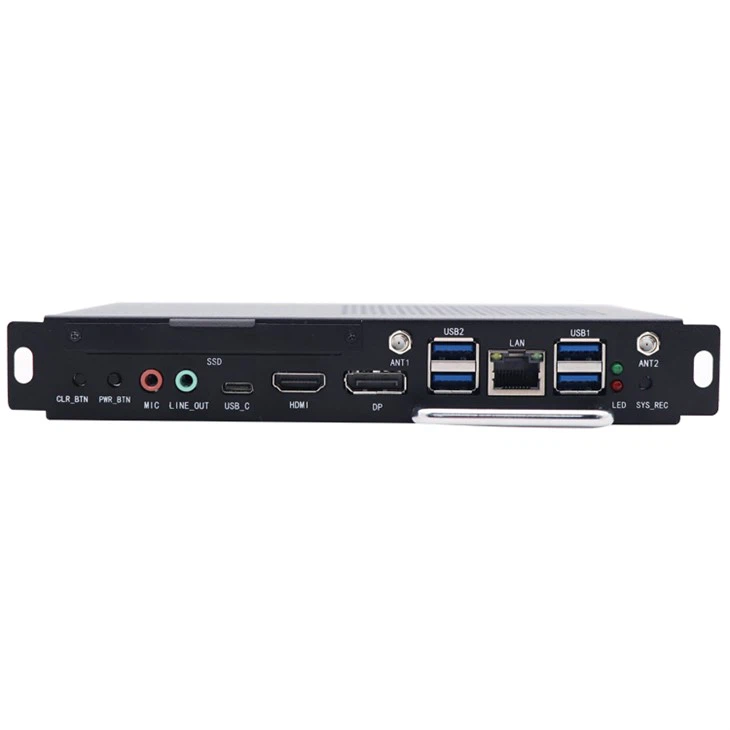
We offer a range of OPS devices that are fully compatible with the on-screen keyboard in Windows 10. For instance, our OPS I5 is a powerful and reliable device that works seamlessly with the on-screen keyboard. It has a high-performance processor that ensures smooth operation, even when using resource-intensive applications.
Our 1744-IOPS is another great option. It's designed for industrial use, with a rugged build that can withstand harsh environments. The on-screen keyboard works just as well on this device, providing a convenient way to input data.
And then there's the 1023-OPS. This device is known for its energy efficiency and compact design. Despite its small size, it offers excellent performance and full compatibility with the on-screen keyboard.
Troubleshooting
Sometimes, you might run into a few issues when using the on-screen keyboard. If it doesn't appear when you try to access it, make sure that the "Use the On-Screen Keyboard" option is enabled in the Ease of Access settings. To check this, go to the Start menu, click on "Settings," then select "Ease of Access." Under "Keyboard," make sure the toggle switch for "Use the On-Screen Keyboard" is turned on.
If the on-screen keyboard freezes or becomes unresponsive, try closing it and opening it again. You can also try restarting your OPS device. In most cases, these simple steps should fix the problem.
Conclusion
So, there you have it! Using the on-screen keyboard in OPS Windows 10 is easy and convenient. Whether you're using a touchscreen device, your keyboard is broken, or you just prefer a virtual keyboard, it's a great solution. And with our range of compatible OPS devices, you can enjoy a seamless typing experience.
If you're interested in purchasing our OPS Windows 10 products or have any questions about using the on-screen keyboard, feel free to get in touch with us. We're always happy to help and look forward to discussing your needs.
References
- Microsoft Windows 10 Documentation
- OPS Product Manuals